Setting Up and Optimizing Your Facebook Fan Page

Building Your Facebook Fan Page
It’s important to build social media sites to drive business to your website.
In this chapter, your objective is to build your Facebook Fan Page and optimize it for best results.
Let’s begin by setting up your Facebook Fan Page. To begin, go to this page.
While here, you will need to choose what type of page you want to create. This depends on your business.
If you have a “brick and mortar” physical location, and most of your customers will go to that location, you want to choose “Local Business or Place.”
If you have a business where you work from home or travel to your client’s location, then choose “Company, Organization or Institution.”
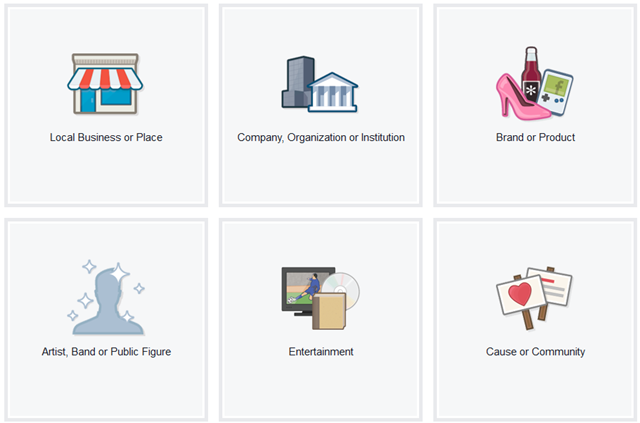
Click on the choice that matches your business. Complete the information in full. The more fields you complete, the more you will benefit.
Below we will outline the process for a local business. If you are a company, organization or institution, skip to the following section below.
Fan Page: Local Business or Place
Step 1: Fill out your information and click “Get Started.” Your page is now created, so it’s time to fill out some basic information about your business.
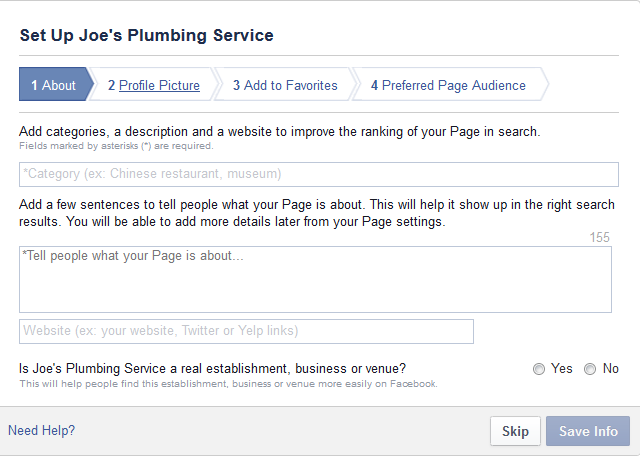
Step 2: Fill out more information.
- Choose the category that best matches your business. As you begin typing, it will offer you suggestions. Then, copy the description that you wrote at the beginning.
- Paste your website in the bottom box. Choose “Yes” or “No” to the final question click “Save Info.”
- Upload your profile photo.
- Choose whether or not to add your page to “Favorites”; this simply adds your page to your left hand sidebar when you are logged in to your Facebook account.
Step 3: You will be presented with a screen that looks like this:
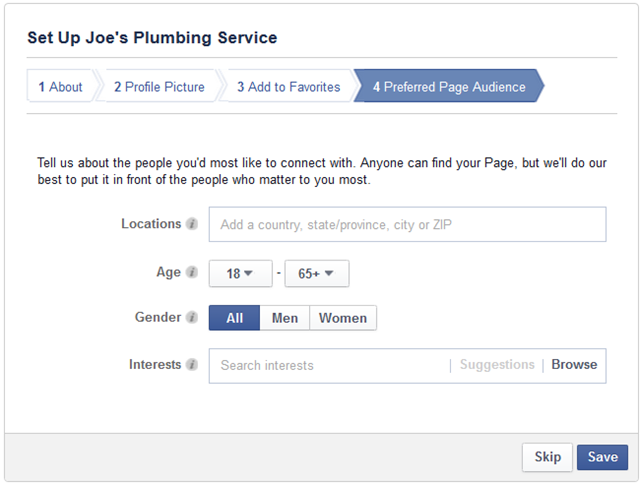
This is where you can choose your target market. It is not required, but if you primarily work with a specific segment of the market, you may want to complete this. Click “Skip” or “Save.”
Step 4: You will land on your actual page.
- Click the “About” tab. On the left hand side, click “Page Info.”
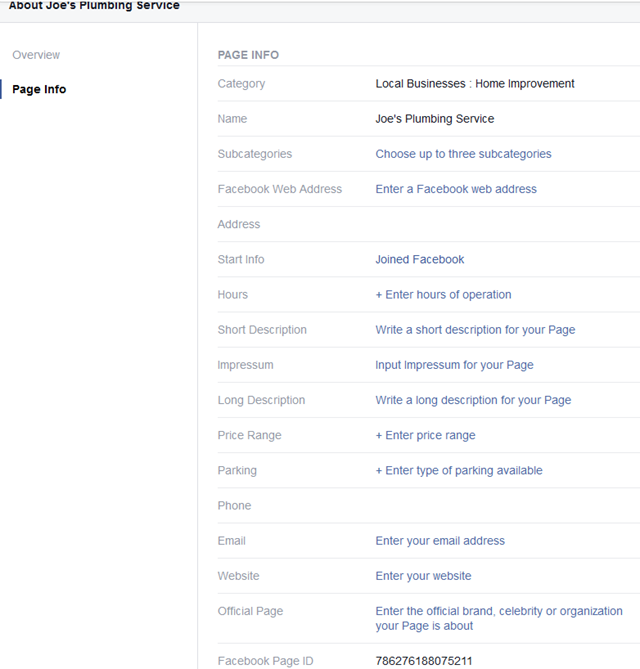
- Add more information about your business, being sure to complete it as best as possible.
Congrats! You are done with Facebook. Be sure to copy the URL of your fan page on your document so you can paste it into the next social media sites.
Now you can skip the section below and head to the next chapter (optimizing Twitter).
Fan Page: Company, Organization or Institution
Step 1: Fill out your information and click “Get Started.” Your page is now created, so it’s time to fill out some basic information about your business.
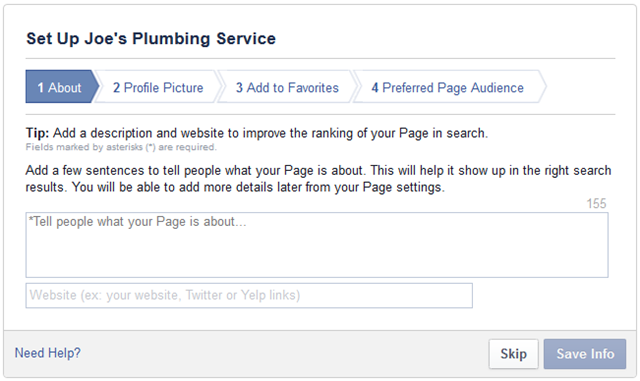
Step 2: Fill out more information.
- Copy and paste the description that you wrote at the beginning.
- Paste your website in the bottom box and click “Save Info.”
- Upload your profile photo.
- Choose whether or not to add your page to “Favorites”; this simply adds your page to your left hand sidebar when you are logged in to your Facebook account.
Step 3: You will be presented with a screen that looks like this:
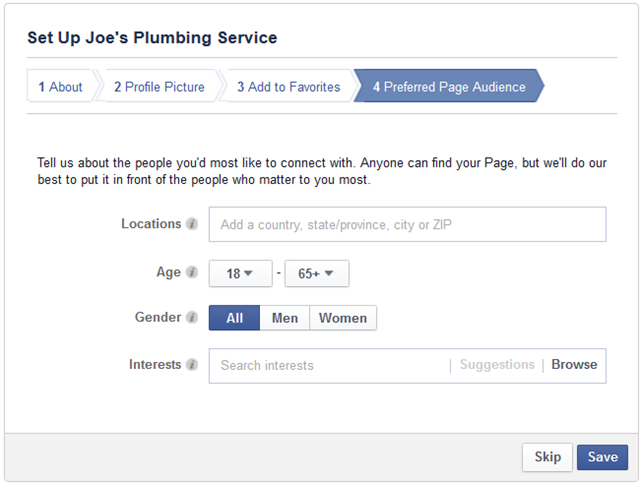
This is where you can choose your target market. It is not required, but if you primarily work with a specific segment of the market, you may want to complete this. Click “Skip” or “Save.”
Step 4: You will land on your actual page. From here, click the “About” tab.
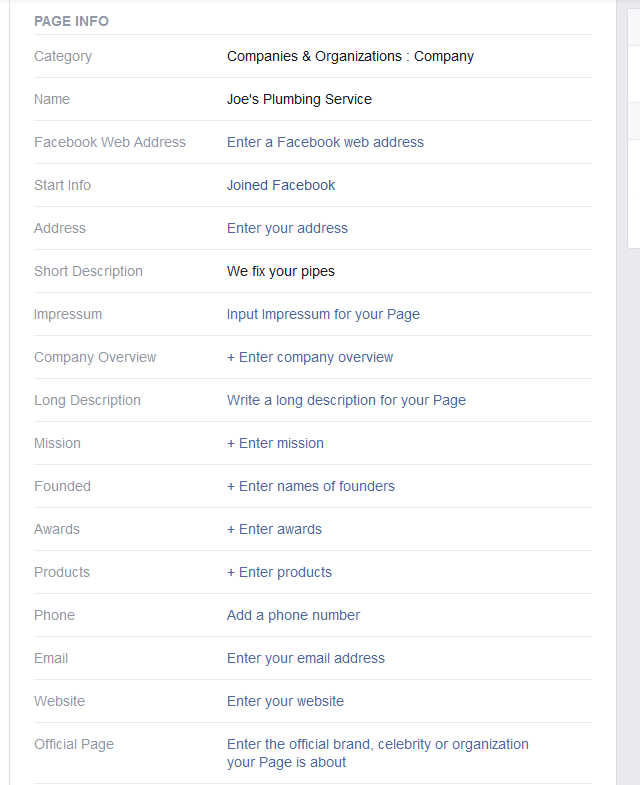
Here you will have the opportunity to add more information about your business. Complete this as best as possible.
Congrats! You are done with Facebook. Copy the URL of your fan page on your document so you can paste it into the social media sites we discuss next.
You’ve met your objective of building your Facebook Fan Page and optimizing it for best results.
In the next chapter, we will set up your Twitter for business page.